It has been a year full of decisions—some very difficult, others quite simple.
I continue to learn what it means to be a father, and it’s proving to be as complicated as I had imagined.
I’m not active on social media, and after the collapse of Twitter, I’ve been trying to revive my activity here on the blog.
On the professional front, I made the decision to leave Netcentric, where I worked for the past five years. I had a great time there, and it was a tough decision, but an exciting new opportunity came my way. I left the AEM consultancy world to join Alén Space, a company focused on building satellites. I now work on their Mission Control System software. So, while I’m still pursuing my career as a Java developer, I’m also taking on a more managerial role, leading a developer team.
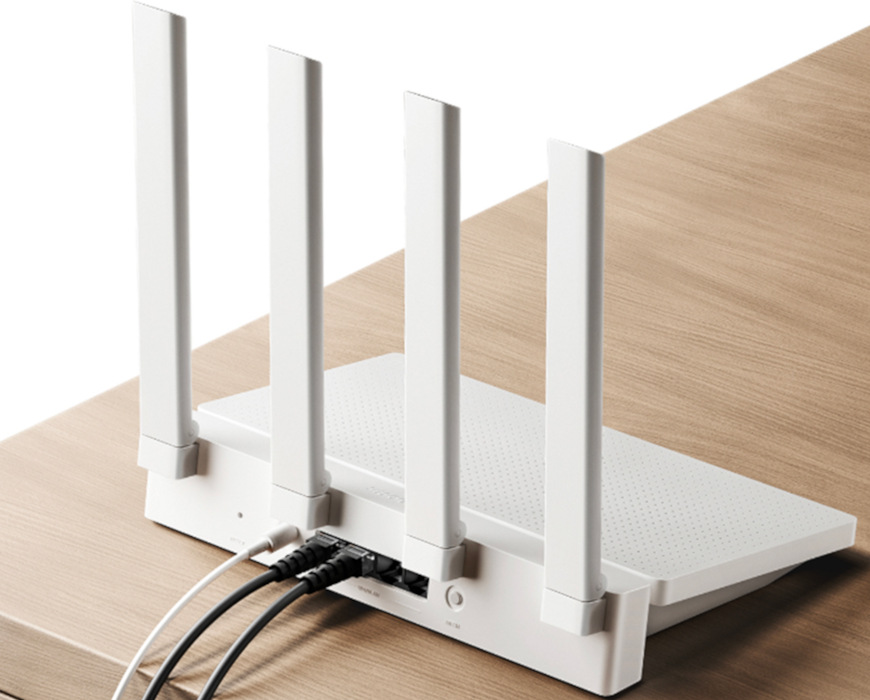
In another change, after seven years of working with a Mac, I’m back on Linux—and I’m very happy about it. I also replaced my old home lab Dell T3500 workhorse with a sleeker Minisforum UM890 Pro, and it’s been amazing. For my home office setup, I’ve also switched back to OpenWRT with a Xiaomi AX3000T (with WiFi 6). I had forgotten how easy it is to configure OpenWRT.
This has also been a great year for my home automation journey. I started the year by moving Home Assistant to a small and efficient Orange Pi 3B. I’m extremely happy with the combination of Home Assistant and ESPHome. Home Assistant has become an essential part of our daily routine, mainly for climate control and air quality monitoring.
On a personal note, we moved from an apartment in the city back to our country house. This means more commuting, but it also means more comfort and a better school for our little one. I was disappointed by Santiago de Compostela—it’s turning into a theme park focused solely on tourism.
Finally, I replaced my 20-year-old diesel car with an electric one. I would have switched sooner if I had known just how great and affordable electric cars are. I chose a Tesla primarily for its price-to-technology ratio. I’m not a fan of the brand or their CEO, but the car has made living in the country much cheaper.
Actualización 16/10/2024: El precio del Model 3 ha bajado de 37.970 € a 36.470 € y os dejo mi enlace de referido para ahorrar 1.000 € más y que os salga en 35.470 €.
Acabo de cambiar mi Citroën C3 con 20 años y 350.000 Km por un Tesla Model 3. A día de hoy comprarse un eléctrico es más barato que cualquier coche de combustión, siempre que dispongas de un garaje donde cargarlo por las noches. Cada vez que digo esto aún veo caras de incredulidad, así que voy a explicar mis cuentas.
Para ello vamos a compararlo con el coche más vendido en España, el Dacia Sandero, y con su versión más barata, un gasolina de 90 CV. Primero vamos a ver los precios de compra:
Dacia Sandero Essential TCe 90CV: 13.490 € (según su web)
Son dos coches de gamas muy distintas y estamos comparando un coche de lujo contra un coche básico. En principio parece que el Model 3 es mucho más caro… no es así.
Primero las ayudas: Con el Model 3 obtienes una deducción en el IRPF de 3.000 € que cobrarás el siguiente año. Luego está el Moves III, que achatarrando tu anterior coche te van a devolver 7.500 € (o 4.500 € sin achatarrar). El Moves III se suele cobrar año y medio después, y ojo que del Moves se paga IRPF que depende de tu tramo de IRPF, pero vamos a asumir que devolvemos un 30%. Así el precio de compra del Model 3 quedaría en:
35.470 – 3.000 – 7.500 x 0,7 = 27.220 €
Por lo que pagamos 27.220 – 13.490 = 13.730 € más por el Model 3. ¿Es posible recuperarlos?
Vamos a ignorar mantenimiento, IVTM, etc. (que también son más baratos en el Model 3) para centrarnos sólo en el gran elefante en la habitación, el consumo en combustible.
Y vamos a usar datos de consumo WLTP (los reales serían más altos y por tanto más favorables al Model 3).
El Dacia consume 5,2 l / 100 km y el día que escribo esto la gasolina está a 1,549 € / l. Por lo tanto, hacer 100 km en el Dacia costaría:
5,2 l / 100 km x 1,549 € / l = 8,0548 € / 100 km
Con los eléctricos hay que acostumbrarse a usar los kWh (kilovatios hora). El consumo WLTP del Model 3 es de 13,2 kWh / 100 km. El precio del kWh depende mucho de donde carges.
Lo que le cuesta inicialmente comprender es que es muy fácil cargarlo en casa, sin necesidad de montar una Wallbox de 1.000 €, simplemente con el Mobile Connector de 200 €. Cargando en un enchufe schuko a 13 A se recuperan 19 km de autonomía por cada hora de carga. En 8 horas de carga por la noche (que es la duración del periodo de bajo coste P3 de la tarifa eléctrica, de 00:00h a 8:00h) se recuperan 152 km. Si no fueran suficientes sí que tendrías que instalar un Wallbox.
Planificándose para cargarlo por las noches en P3 con una tarifa como la Octopus 3 sale el kWh con IVA a:
0,084 x 1,21 = 0,10164 € / kWh
Y hacer 100 Km con el Tesla cuesta:
13,2 kWh / 100 km x 0,10164 € / kWh = 1,3416 € / 100 km
Y cuántos kilómetros necesitamos hacer para recuperar los 13.730 € de diferencia en el precio de compra:
13.730 / (8,0548 – 1,3416) x 100 = 204.522 km
Como os contaba, a mi anterior coche le hice más de 350.000 km. En mi caso comprar un eléctrico es un chollo.
Evidentemente la comparación sale mucho mejor contra un coche de su mismo segmento y características (pocos hay más baratos que el Model 3) y sale peor si usamos cargadores públicos (que en mi caso será de forma esporádica).
A día de hoy las únicas razones para no comprarse un eléctrico serían:
No tener garaje propio o el extraño caso de no poder instalar un enchufe en él.
No poder disponer del dinero para la inversión inicial. Es como una hipoteca inversa, pones el dinero inicialmente y lo vas recuperando mes a mes.
El también extraño caso de que la autonomía no sea suficiente.
Creerte alguno de los bulos que diariamente difunde sobre los coches eléctricos la agonizante industria del automóvil de combustión.
En mi caso me decidí por el Model 3 pero también entiendo que no es coche para todo el mundo. Es muy largo (4,7 m) y requiere estar familiarizado con pantallas táctiles. A lo mejor puedes necesitar más espacio e irte a por un Model Y. El Model 3 SR a día de hoy sigue siendo el eléctrico más eficiente del mercado según https://ev-database.org A nivel tecnológico está una década por delante de las marcas tradicionales. Algunas calidades están rateadas (como la pintura…) pero a mi parecer sigue siendo el coche más disruptivo de este siglo.
Os dejo mi enlace de referido, por si queréis ahorraros 1.000 € euros más al comprarlo:
Some months ago Apple was running a commercial on Spanish TV about the iPhone’s privacy, mocking users with Android devices.
Probably, iPhone users do not know that it is really easy to physically track them.
Apple’s “Find My” network was launched in 2019 and the AirTag in 2021. The AirTag emits BLE beacons with a public key that, when received by another Apple device, are sent along with the location of the device that received them to Apple servers, encrypted with the AirTag public key. The information on the Apple servers needs to be decrypted with the AirTag’s private key.
However, when the AirTag location is updated, the owner of the AirTag also knows that there is an Apple device nearby.
In theory it’s required to have an iPhone/iPad/iPod to activate an AirTag, but it’s very easy to build an AirTag clone with ESP32.
The firmware to flash an ESP32-WROOM-32 and convert it to an AirTag clone
An Android app to check the location of your fake AirTags
Two Docker containers needed to retrieve the info from the Apple servers, they need to be accesible by the Android app
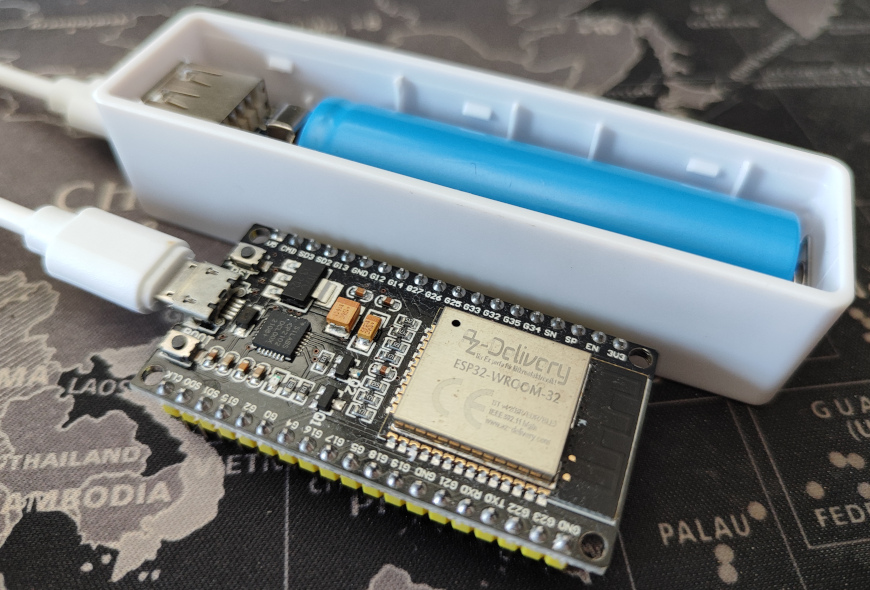
And, of course, I built my own one:
These ESP clones are much bigger than AirTags but they are ok to track cars, suitcases or bags. There is a PR to the Macless Haystack repo alowing to use an ESP32-C3 Supermini, that makes a smaller device with a better battery duration.
Google launched the “Find My Device” network in April 2024, and the tags supporting it (i.e. the Chippolo Point or the Pebblebee) are slowly reaching the market. But the default security option only shares the location information if there are other Android devices nearby. That is much better for the privacy of Android device owners, but much worse for the owners of the tags.
So, if you own an Android device, it is still better to use AirTag clones, abusing the lack of privacy of the Apple devices.
Some years ago, my network provider (O2 – Spain) installed a router for me (Mitrastar HGU GPT-2541GNAC) with much better specs than my old OpenWrt router (TP-Link TL-WDR4300). So, I ditched OpenWrt and started using the company’s router.
But the Mitrastar needed to be factory reset every 6 months because it had some problems with the DHCP in my network. Recently, I offloaded the DHCP to an OrangePi 3B, but now my home network was relying too much on the availability of this device. Also, the Mitrastar is starting to show its age without features like WiFi 6…
A couple of weeks ago I found on Aliexpress a new Xiaomi AX3000T router. It has an amazing set of specs:
2 ARMv8 cores @ 1.3GHz (MediaTek MT7981B)
128 MB ROM
256 MB RAM
WiFi 6 (AX) in the 2.4 GHz and 5 GHz bands
And it’s compatible with the lastest snapshot of OpenWrt:
I was able to get it during the AliExpress ChoiceDay (this happens the first days of each month) for 26 EUR (including a 4 EUR coupon).
When it arrived, I found it a bit smaller than what I expected, and I liked its minimalist look. It has only one button for WPS (+ the reset pinhole), and one LED in the front panel (i.e. it does not have LEDs on the ethernet ports).
Everything was in Chinese, but it’s easy to read it using the Google Translate camera, only for the steps necessary to set up OpenWrt. I did a simple installation without the U-Boot boot loader.
So, I put again an OpenWrt router back in my home network moving the DHCP and WireGuard services to the router. I had forgotten the beauty and simplicity of OpenWrt.
I also tested adblock-lean and it works quite well on the router with big lists like https://oisd.nl/: It’s able to manage the 660K domains of both oisd big and osid nsfw lists. But at the moment I’ll continue using the Pi-hole on the OrangePi. I still need the OrangePi to run Home Assistant and the NAS.
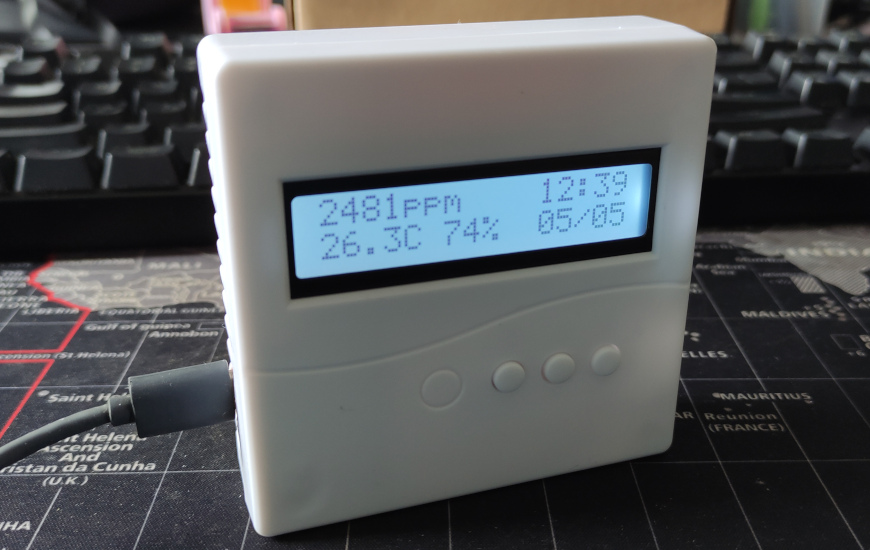
I wanted to add an LCD screen to my CO2 sensor, so I bought a white LCD 1602 with an I2C controller. The I2C controller needs to be soldered to the LCD, but my basic soldering skills were sufficient for the task.
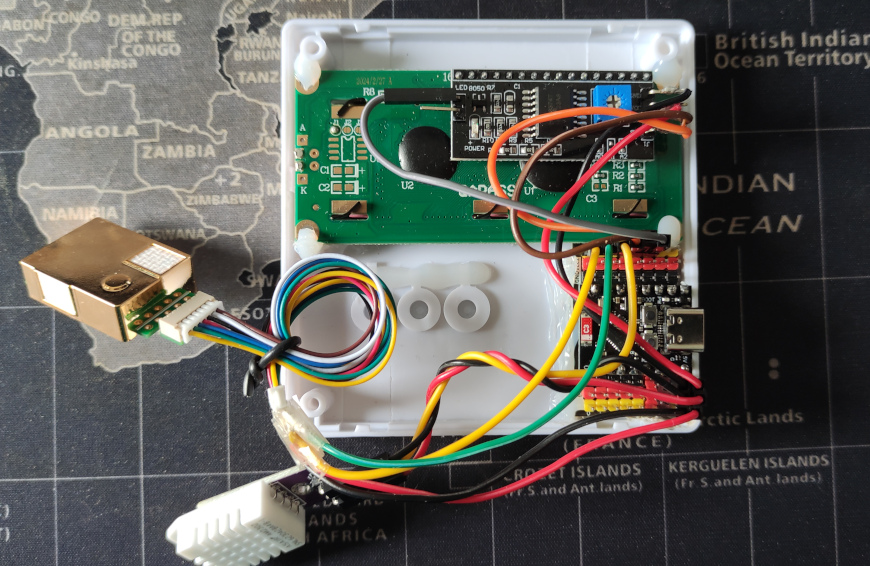
I also wanted to place it in a box, so I purchased this plastic enclosure but I cannot recommend it. It required a lot of glue from a glue gun to install the LCD and the ESP. I also had to use the soldering iron to create space for the ESP and a hole for the USB connector. I installed the plastic buttons but they are only decorative.
I made room for the sensors inside the box, but finally left them outside because they are more precise that way.
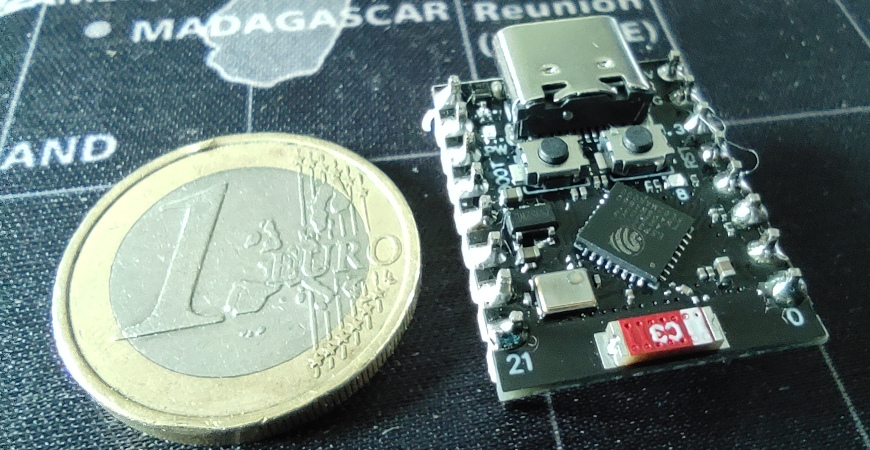
The ESP32-WROOM-32 was too large for the enclosure, so I used a ESP32-C3 Supermini with an expansion board. This is a really amazing board with a 32-bit RISC-V 160MHz microcontroller, WiFi, Bluetooh, I2C and UART. It’s not as powerful as the ESP32-WROOM-32 with a dual core 32-bit Xtensa 240Mhz, but it’s more than capable to control the sensors and the LCD.
This is the ESPHome configuration, which includes a switch to control the LCD backlight and a clock synchronizing the time with Home Assistant:
To keep a healthy environment at home or at the workplace, one of the important things to control is the carbon dioxide (CO2) level.
It’s measured in ppm (parts per million), indicating how many parts of CO2 there are in one million parts of air. As a reference:
Less than 1000 ppm are healthy levels
Between 1000 ppm and 2000 ppm, we need to reduce the CO2 levels
Levels greater than 2000 ppm are associated with headaches, sleepiness, poor concentration, loss of attention…
To reduce the CO2 level, we need to ventilate the room. It can be manually done (opening the windows) or it can be automated with a ventilation system.
To measure it we need a proper CO2 sensor, and one of the most reliables sensors is the MH-Z19B. It is not cheap for the Aliexpress standards (it costs around 20 EUR), but other cheap sensors announced as “air quality” sensors or “eCO2” sensors are not really measuring the CO2 level (i.e. the MQ135).
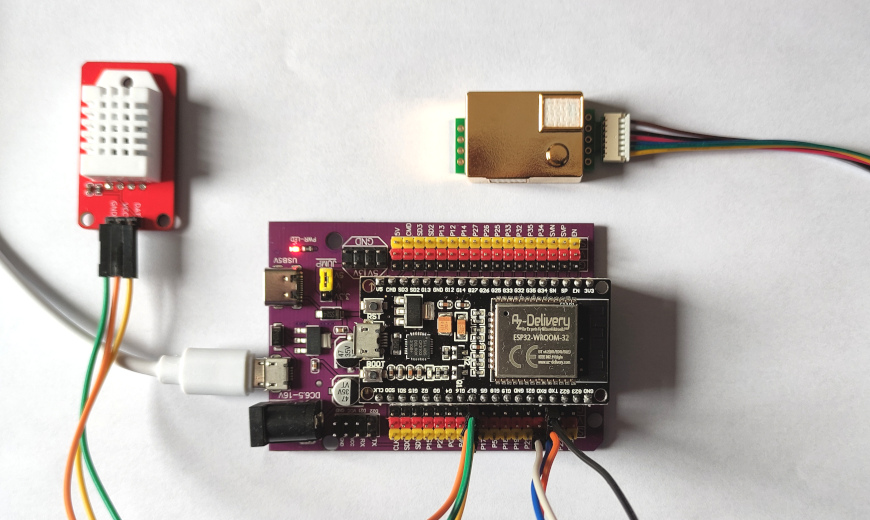
I bought this MH-Z19B from Aliexpress and hooked it to an ESP32-WROOM-32 board. This board is going to be also purposed as a temperature and humidity sensor, so I also attached a DHT22 sensor. I bought this DHT22 sensor but it is not an original one, and the measures do not seem very correct, so I ordered again an original AM2302 (=DHT22). The MH-Z19B includes a temperature sensor, but it’s mainly used for calibration and it lacks precision, as it does not report decimals. I’m also using an expansion board to simplify the connections.
The jumper in the expansion board needs to be set to 5V (because both of these sensors need 5V).
Connected VCC and GND of both sensors to the expansion board
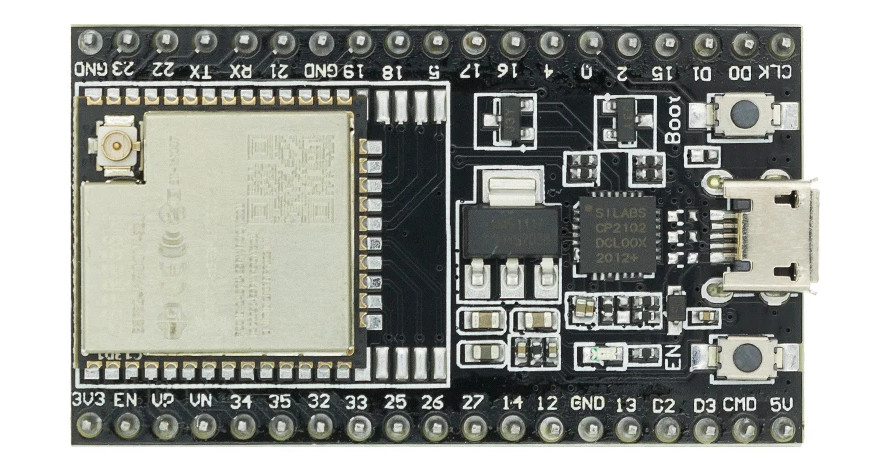
Connected the RX and TX of the MH-Z19B to the TX and RX (GPIO1 and GPIO3) of the ESP
Connected GPIO16 to the DAT of the DHT22
Finally, I installed ESPHome to the board with this configuration:
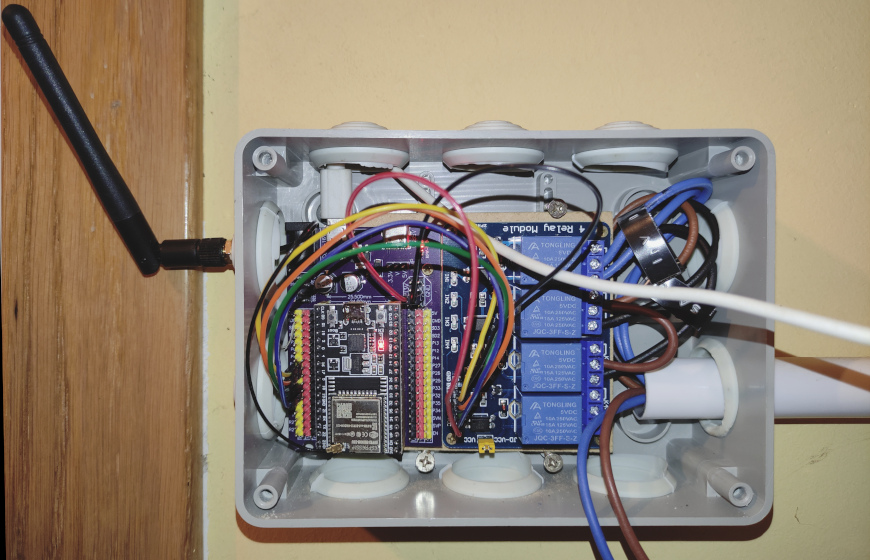
The heating system is in a different builng than the router and I was experiencing some WiFi coverage issues (the WiFi signal needs to cross two metallic window blinds…).
To diagnose the WiFi coverage is very useful the wifi_signal sensor in ESPHome:
sensor:
- platform: wifi_signal
name: Wifi Signal
update_interval: 60s
It was showing a WiFi signal of -95 dBm in the board: This is very low, and it was experiencing some disconnections.
Usually the ESP32 boards have an antenna integrated in the board, but the ESP32-WROOM-32U has an IPEX connector for an external antenna:
So, I spent less than 10 EUR in Aliexpress buying (affiliate links):
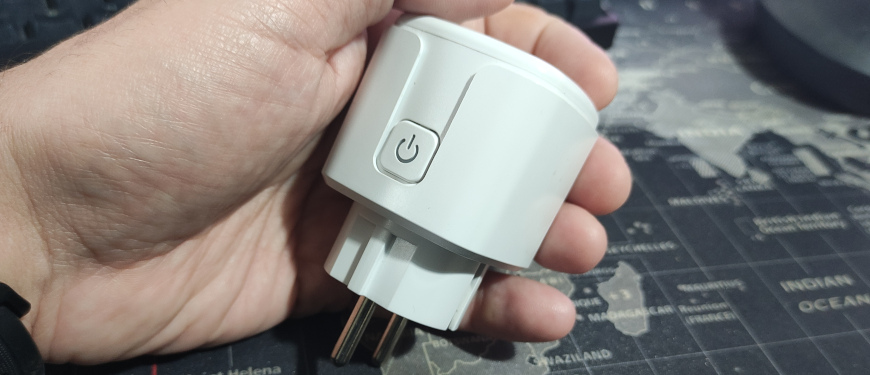
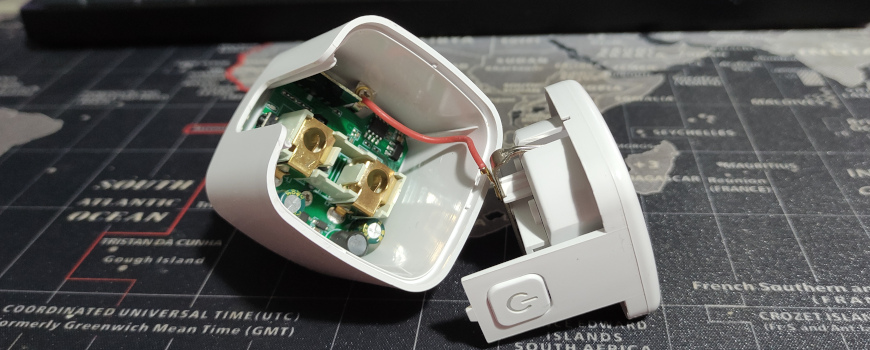
I bought from a popular chinese store a generic Tuya smart plug with power monitoring. It was extrememly cheap, costing less than 4 EUR. And of course I bought it to play trying to flash ESPHome.
The first challenge was to open it without breaking it. I was able to open it by wrapping it in cardboard and gently tapping it with a hammer around the body.
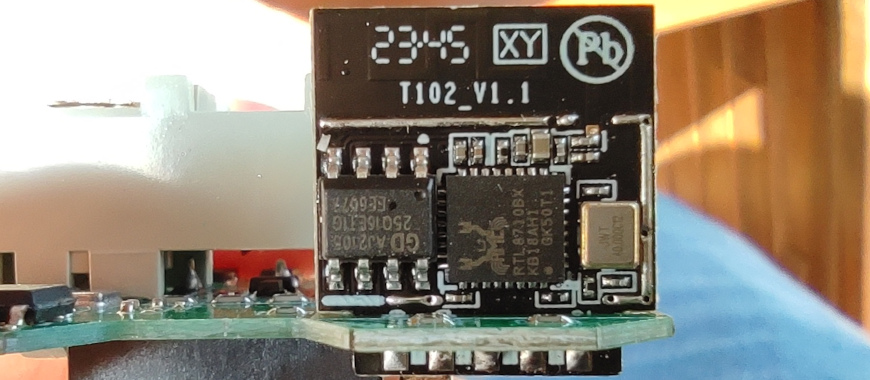
You never know what chip you are going to find. In the past ESP8266 was very common but now they switched mainly to Beken chips. This smart switch has a T102_V1.1 board with a Realtek RTL8710BX chip:
Luckily the support for this chip was developed in the LibreTiny project:
After the flashing, if I try to power it from USB the WiFi module did not start and it causes a boot loop, but It worked perfectly plugging it into the mains power. A new device appeared in the router and I can connect to the ESPHome web dashboard.
Adding power metering
The plug includes a power metering chip: the BL0936, that is supported by ESPHome:
However, after configuring and uploading the firmware with the power meter enabled to the board, the device enters a boot loop, displaying the following error:
[D][switch:016]: 'Smart Plug 1' Turning OFF.
[D][binary_sensor:034]: 'Button': Sending initial state OFF
[C][hlw8012:014]: Setting up HLW8012...
W [ 0.109] CHANGE interrupts not supported
Luckily, after 10 reboots, the firmware enters in the “OTA safe mode”, disabling all the modules and connecting to the WiFi without the web dashboard but opening a port to allow remote flashing.
It can be fixed with the workaround of SuperXL2023 modifying the .esphome/platformio/platforms/libretiny/cores/realtek-amb/arduino/src/wiring_irq.c file and adding the lines 64 and 65:
In the ESPHome config I’m specifying the version of the framework to avoid losing this fix in an automatic update. It works perfectly after rebuilding the image with this fix and uploading it to the device.
This is the complete ESPHome configuration with power metering:
It needs to calibrate the sensor to obtain the proper values of voltage_divider, current_resistor and current_multiply. It can be done with a multimeter and entering the values in the hlw8012 page.
I’m using it to remotely access private services in my home server. I setup a star topology, where all the VPN clients connect to the home server and they can only see the server.
So I need a dynamic DNS and an open port in the router, I already have them for Home Assistant.
Eloy Coto recommended Tailscale, it is an amazing mesh VPN based in WireGuard. It’s much simpler to set up, and you do not need to open public ports, but it’s commercial and a bit overkill for my needs.
Generating the WireGuard configurations
The most tedious part of WireGuard is to generate the configurations, but there are some nice tools to ease that, like:
The tool generates the configuration for the server and for the requested number of clients. It does everything in the frontend, so it is not leaking the VPN keys.
As I’m only acessing the server, I have removed the IP forwarding options in the Post-Up and Post-Down rules.
Installing and configuring the WireGuard server
WireGuard is in the official Ubuntu repos, so to install it in the server it’s enough to do:
sudo apt install wireguard
Then I needed to put the config in the /etc/wireguard/wg0.conf file and do:
To setup the client in the phones, the WireGuard Config web tool generates QR codes. In other devices you’ll need to create a file with it or paste the config contents.
Using Pi-hole from the VPN clients
To use the Pi-hole hosted in the same VPN server from the VPN clients, you can specify a DNS property in the client config, i.e. if the server is 100.100.1.1 and the client is 100.100.1.2:
Every time that you connect the VPN, the DNS server in the client changes to 100.100.1.1 and it is reverted to the previous DNS server when the VPN is disconnected.
Additionally, Pi-hole needs to be listening in the wg0 interface, I explained how to make Pi-hole listen on multiple interfaces in the Pi-hole post.
ChatGPT was launched in November 2022, and it changed our world as we knew it. Since then, Large Language Models (LLMs) have integrated into our daily workflows enhancing our productivity and the quality of our work.
Another interesting milestone happened in February 2023, when Meta released the Llama LLM under a noncommercial license:
This sparked the enthusiasm among numerous developers dedicated to advancing LLMs, leading to a increase in collaborative efforts and innovation within the field. A good example is the Hugging Face Model Hub where new models are constantly published:
Mistral 7B was released in October 2023, achieving better performance than larger Llama models and demonstrating the effectiveness of LLMs in compressing knowledge.:
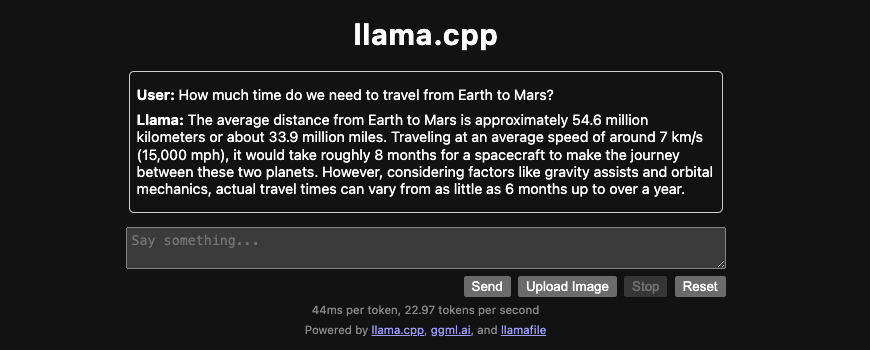
And now it’s easier than ever to locally execute LLMs, especially since November 2023, with the Llamafile project that packs Llama.cpp and a full LLM into a multi-OS single executable file:
And about using LLMs for code generation (Github’s Copilot has been available since 2021), there are IntelliJ plugins like CodeGPT (with its first release in February 2023) that now allows you to run the code generation against a local LLM (running under llama.cpp):
Google is a bit late to the party. In December 2023 they announced Gemini. In February 2024, they launched the Gemma open models, based on the same technology than Gemini:
And finally, if you are lost among so many LLM models, an interesting resource is the Chatbot Arena, released in August 2023. It allows humans to compare the results from different LLMs, keeping a leaderboard with chess-like ELO ratings: